No matter what your political slant is, we can all agree that it is a strange time for American politics. It’s no surprise that many are looking back with fondness at Aaron Sorkin’s The West Wing as a source of comfort. The show presents a sane (if overly ideal) version of the White House in which a small group of dedicated people work to make a difference, and where party politics are second to duty and service for the greater good.
In that same vein, I thought it would be fun to try and recreate a prop from the show: the “Bartlet for America” napkin.
References
The napkin makes its first appearance in the eponymous “Bartlet for America”, season 3 episode 10. Our current White House Chief of Staff, Leo McGarry, is being deposed before Congress. He is asked about how President Bartlet came to run for President, and the audience is shown a flashback where Leo travels to see then-Governor Bartlet in New Hampshire in order to present him an idea:
I’ve been walking around in a kind of daze for two weeks and everywhere I go… planes, trains, restaurants, meetings… I find myself scribbling something down.
Leo takes something out of his pocket, licks it, and sticks it to the easel:
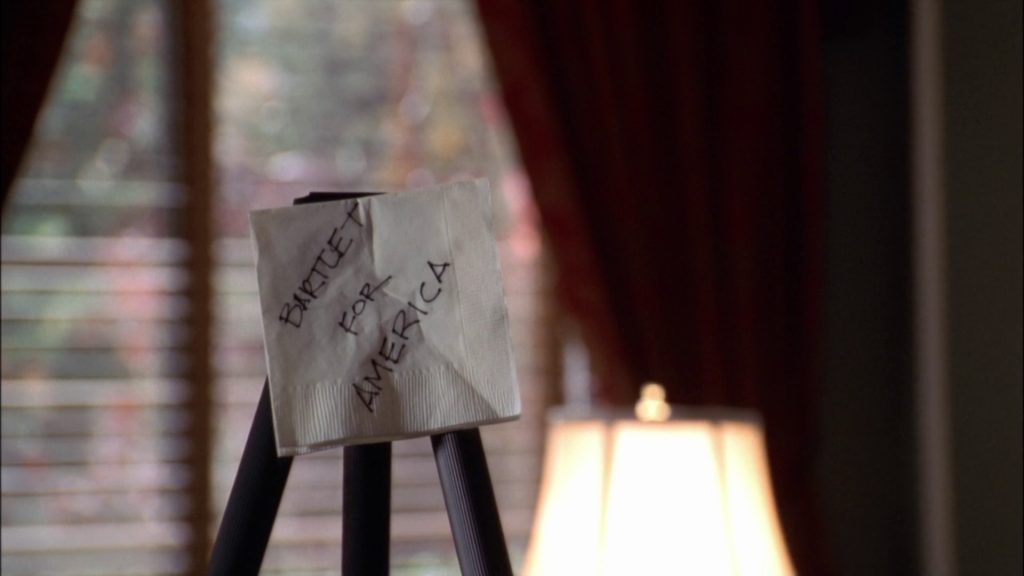
This shot is exactly what you want if your goal is to make a prop replica: it’s bright, in focus, unobstructed, and straight-on. Unfortunately while this is the napkin in the West Wing universe, it’s not the napkin in ours. That is to say, this is not the same napkin that ends up framed at the end of the episode. So while this shot gives us some good information about the napkin itself (size, pattern, etc.) we cannot use it as a reference for the writing.
Which brings us to the end of the episode. At the last minute Leo is spared from an embarrassing recounting of an alcoholic episode, and the President thanks him for everything he’s done by presenting him with a framed copy of that very same napkin he gave him four years ago:
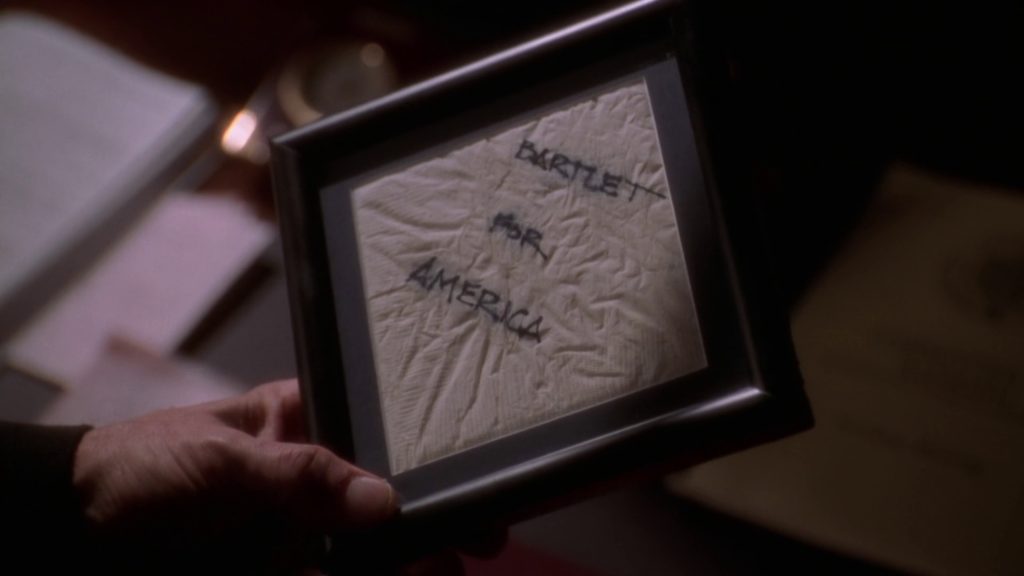
This is the napkin I want to replicate. This shot is not so kind to us: it’s dim and it’s at an angle, but it will do just fine. The framed napkin reappears four years later in the series finale (S7E22 “Tomorrow”) in a matching shot, although that’s not any clearer than this one.
We can tell that the napkin has seen some significant wear from its introduction just 30 short minutes earlier. It has some wrinkles and the ink has bled, leaving dark splotches behind the text.
The Napkin
The napkin itself is a stereotypical paper napkin: white with coin-embossed edging along two sides. From careful inspection it appears that it is not a typical dinner napkin (~8 x 8″) or luncheon napkin (~6 ½ x 6 ½”), but rather a smaller beverage napkin (~5 x 5″). These napkins are ubiquitous, and thankfully they can be purchased in small quantities online. I found some 4 ¾” napkins with a coin edge that should fit the bill nicely.
Maybe-not-so-fun aside, but given the theme of addiction and alcoholism in this episode it’s interesting that the propmakers chose a beverage napkin. There’s a not-so-subtle implication that Leo’s work took the place of his addiction to alcohol. But that’s another essay for another time.
The Frame
Given that the napkin is supposed to be ~5 x 5″, the next available standard square frame size up is 6×6″. I put together a few mockups of the napkin and mat with a 6″ square frame and was confident that the ratios would look more-or-less right.
In the show, the napkin is presented in a square black or dark bronze frame with a rounded profile. The sheen on the frame suggests that it’s made out of metal, and given the context in which it’s gifted the frame is almost certainly custom from a framing shop.
For this prop I didn’t want to spend that kind of money. Modern black photo frames with square profiles are abundant and inexpensive, so I purchased one on Amazon for less than $10.
The Mat
Around the napkin is navy blue matboard with a square window. Using screenshots from the show, I measured that the napkin takes up approximately 80% of the frame’s window area. My frames have a window area of 5.6″, so I decided on using a 4 ½” window in the mat. That would leave a ⅛” margin around the napkin
I purchased a sheet of navy blue matboard, cut it to size with a mat cutter, and then cut out the 4 ½” window. After a few tests I discovered that the napkin, once properly wrinkled to match the one in-universe, did not lay flat enough to hold the ⅛” margin around the window – the edges kept escaping. After a few too many tries to get the napkin to behave, I conceded defeat and cut a new mat with a 4 ⅜” window. The ratio for the prop is slightly off, but I think it will still look the part.
The Text
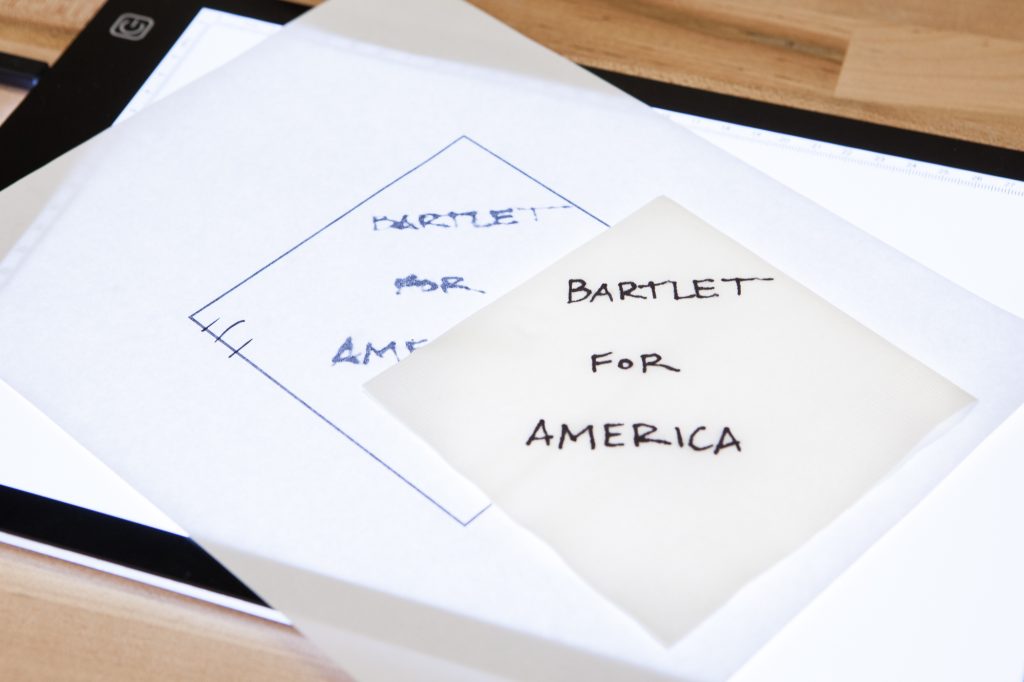
As the text is clearly handwritten, I needed to use the episode for reference. I imported a screenshot from the end of S3E10 into Photoshop and did my best to correct the perspective of the napkin until it was square. From there I passed the image through a few filters to try and isolate the text, resized it to the actual size of my own napkins, and printed it on letter paper.
Using a lightboard, I placed the napkin on top of the reference print and traced the text with an ultra fine permanent marker (Sharpie). Since the surface of the napkin is fragile, I used one hand to hold it taut and moved the marker’s tip slowly so that the ink had time to bleed in. The end result isn’t perfect but I think it’s close enough.
Aging (Scrunching)
The last step is to age-up the napkin, so it looks like it has experienced the wear and tear of its 4 years of life. For this I very scientifically scrunched the napkin into a ball and held it tight in my fist for a few seconds, then unfurled it and repeated the process.
One thing I didn’t add was the water spots / ink bleed. I did a few experiments and water didn’t have any significant effect on the ink, but did noticeably damage the napkin’s integrity even after it dried. I also tried various ratios of isopropyl alcohol and water, but since the Sharpie marker dilutes to a purple base rather than a blue I couldn’t get it to look quite right. For next time, it would be worth experimenting with different markers / inks, or perhaps trying some diluted watercolor paint.
Assembly
With all of the ingredients cooked to perfection close enough, it was time to assemble!
I used two small strips of linen hinging tape to attach the napkin to the back of the mat. I purposefully mounted the napkin slightly off-center to try and expose as much of the coin-edge as I could. I then placed the mat & napkin sandwich into the frame and reinstalled the frame’s backing.
What’s Next?
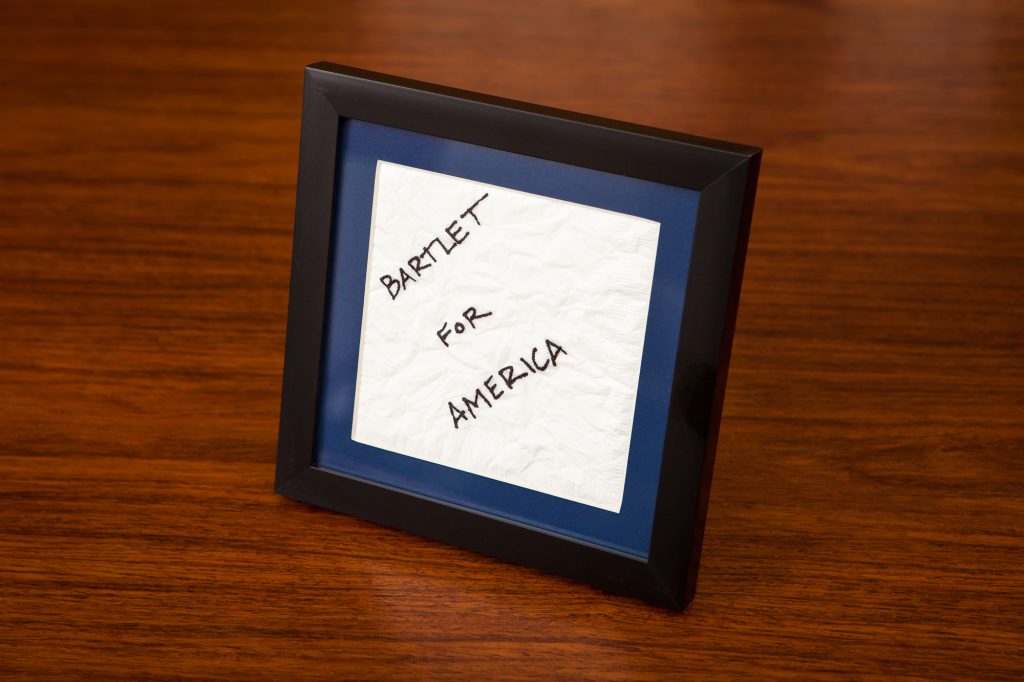
The napkin is complete! It’s not a perfect replica, but I think it’s close enough for government work. A nicer frame would go a long way to kicking the quality up a notch, if I ever want to make the investment. In the meantime this is going to find a home on my shelf next to my “Bartlet Hoynes ’98” mug.
Are there any other props from The West Wing you’d like to see me make? Leave a comment below!
Parts List
Want to make one of these for yourself? Here’s a list of all of the supplies I used:
- Beverage Size (4 ¾”) Paper Napkins, White
- Sharpie Ultra Fine Tip Permanent Marker
- 6×6 Black Photo Frame
- 1/16″ Blue Matboard
- Lineco Self-Adhesive Linen Hinging Tape
And the tools:
Please note that some of these are Amazon Affiliate links, which help fund the content on this site. As an Amazon Affiliate I earn from qualifying purchases.