In this post I’m going to show you how to calibrate your ambilight in Prismatik so that it matches your screen, showing proper white and truer colors! This is going to be a long post, so sit back and strap in!
This post is part of a series on creating a DIY ambilight using Adalight and WS2812B LEDs. Check out the project page here.
Understanding White
I’ll let you in on a secret: in real life there is no such thing as “pure white”. In theory white is composed of equal amounts of all colors, but theory only gets us so far. In reality, the so-called “white” lights around us are tinted various colors. The color of light sources is measured on the Kelvin scale, which is based on the color of light emitted from a theoretical black-body heated to a specific temperature. For example, your household tungsten lights are yellow-white and typically rated at 3200K, while sunlight is blueish-white and typically rated at 5500K. Some lights are also tinted magenta or green, like your stereotypical “horror movie green” fluorescents.
You might not notice these color variations because our brains are constantly auto-correcting the color in the world around us. In the same way that our pupils adjust to brightness, our brains tweak our color perception based on light. If you’re sitting indoors reading a book you probably won’t notice that the tungsten lamp you’re using is making the pages yellow, because you see them as white. But if you go from a dimly lit room to bright daylight, you might initially be surprised by how blue everything looks.
It’s when there are multiple light sources of different colors that our eyes get tripped up. In this case: a monitor and an ambilight. Not only will your eyes not correct both lights, but if they’re vastly different your eyes will more-or-less “shoot the average” and both of them will look off. Yikes! This is why it’s so important to calibrate the ambilight’s colors.
Doesn’t Look Like Anything to Me
If you build your own ambilight and you’re fine with the way it looks out of the box, that’s okay! While a properly calibrated setup will produce truer colors, it will also make your setup darker because some of the LEDs won’t be lighting up as much. I prefer the more accurate colors, but your mileage my vary. You can always calibrate (or re-calibrate!) at any time, and if you don’t like it it’s easy to switch back.
Finding Our Starting Point
Before we start tweaking, we need to figure-out roughly how far the color is off. If you have a color-calibrated monitor, you should recalibrate it before continuing. If you don’t have a color calibrated monitor, you should probably run through an online calibration tool just to check that your brightness and contrast are set to reasonable settings.
Let your monitor warm up for at least half an hour and then turn on the ambilight. It’s important to do this in a dark room so other lights aren’t throwing off your perception. The wall behind my monitor is a light blue, so I put up a piece of white foamcore to make things easier to judge.
In Prismatik, make sure the lights are set to 100% brightness and your preferred gamma (2.00 should work fine) in the ‘Device’ panel. Since we’re measuring pure white the ‘over-brightening’ and ‘scene luminosity threshold’ settings shouldn’t matter, but it may be wise to set them to 0 so they don’t interfere.
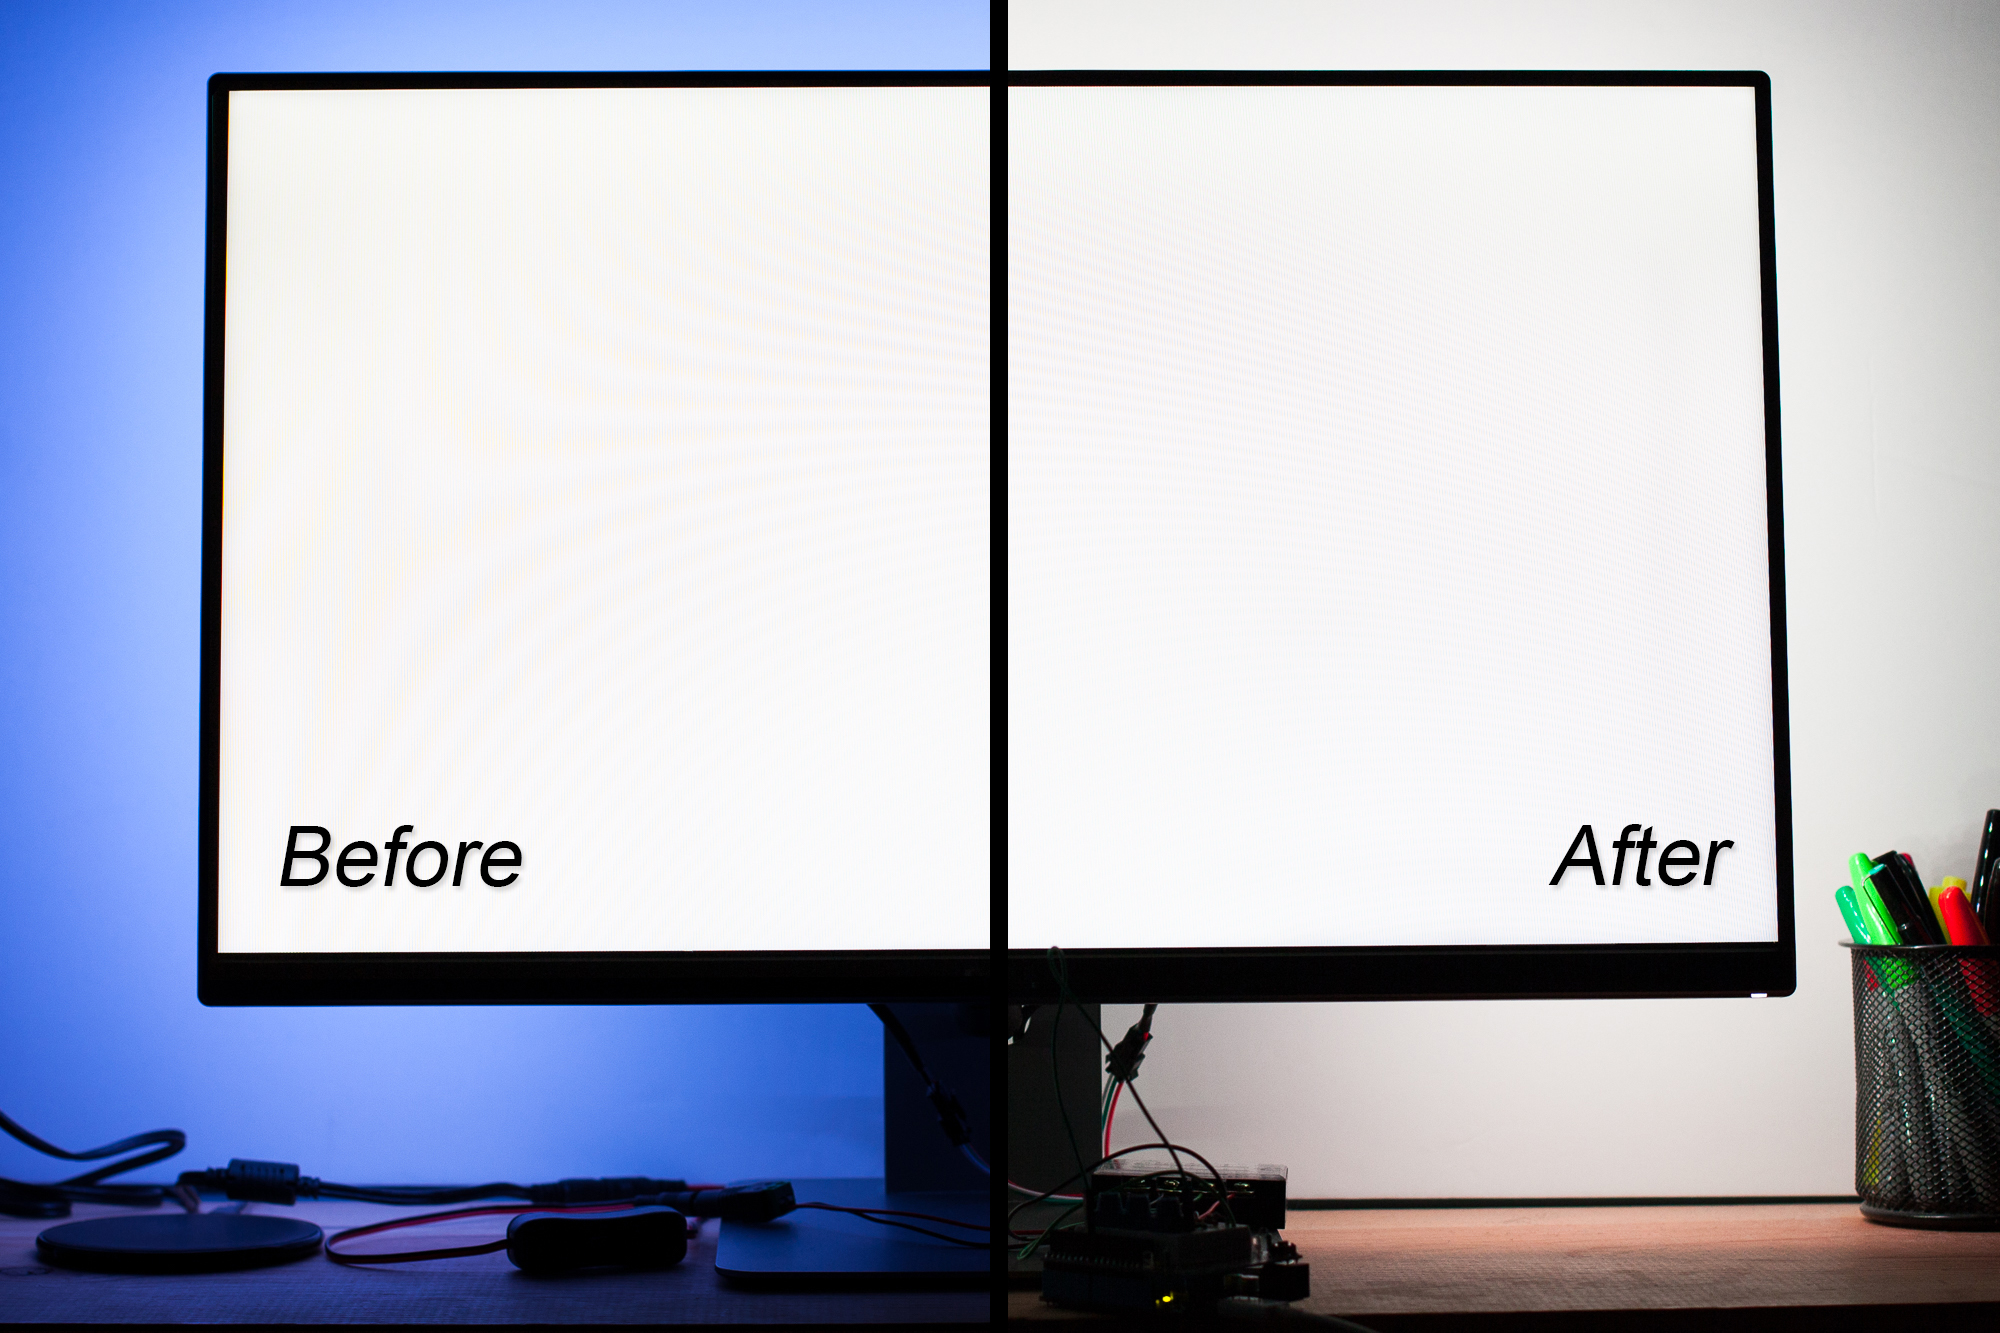
Open up a white screen on your computer (Notepad works well for this, as does “about:blank” in a web browser) and take a step back. How does it look? Do the whites match? Let’s look at my setup.
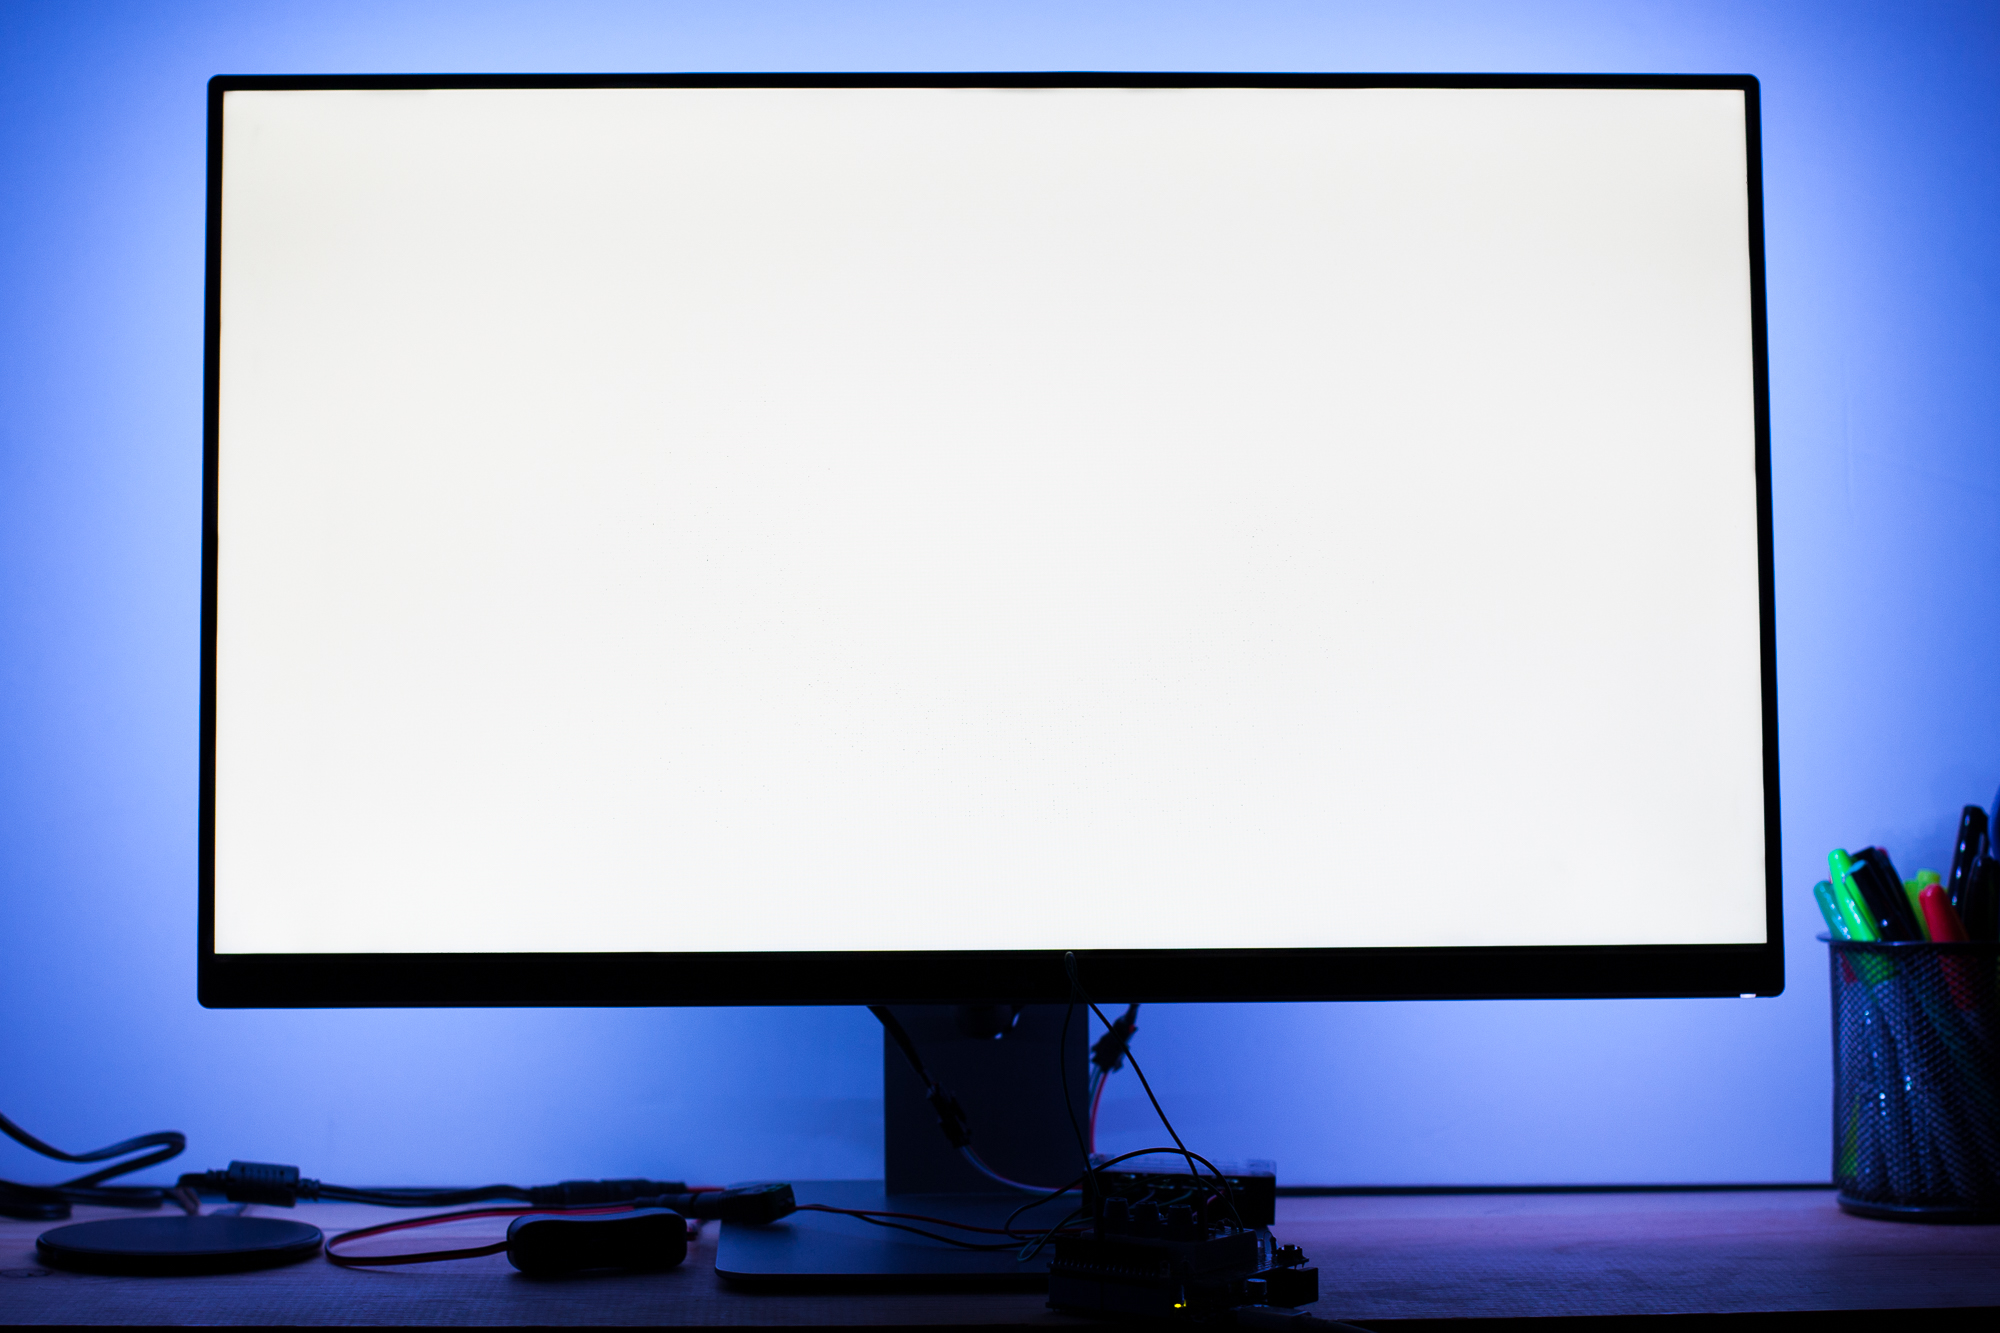
Oi. That’s not good. That’s blue. That’s very, very blue.
“How blue is it?”
There’s no reason for you to measure your own lights’ Kelvin temperature, but I was curious. I don’t have a color meter, but what I do have is a fancy-schmancy digital camera. One quick shot of a gray card, throw it into Photoshop and the Kelvin temperature is….
48,000K.
Well, yikes.
Let’s put that number in perspective. 5500K is the bluish-white color of the light coming from the sun. During a cloudy day, that can get up to around 6500K. The light from our ambilight just read at 48,000K.
Matching White to White
If you haven’t already, I’d recommend reading my post on digital color representation.
Now we know what direction we need to go: we need to reduce the blue level a lot until the strip’s “white” is in line with our monitor. Now it’s time to get our hands dirty with the actual calibration.
Calibrating Adalight vs. Other Ambilights
Prismatik, at least for the moment, is not very helpful in this department. While it has a well-hidden GUI for adjusting color balance, it only allows you to adjust one capture zone (LED) at a time. I’ve opened an issue with psieg’s fork on Github to see about having a global GUI added, but for the time being we’re going to have to work around it.
If you’re using an Adalight device, I wrote some code to get around this that sets all of the LEDs to the values of a single capture zone. You can download my build from Github. Simply uncomment the “calibration” #define at the top to enable the calibration mode. You’ll have to re-upload the Adalight sketch to the Arduino to change between modes. Make sure to close Prismatik first so that the Arduino IDE can open the serial port for uploading.
Unfortunately if you’re using a device other than Adalight, I’m afraid it becomes a bit more difficult. You’ll have to figure-out how to isolate a zone to find the calibration numbers. If you can, re-run the setup wizard and enable only one LED or group.
Performing the Calibration
Before going any further, you’ll want to duplicate your Prismatik profile so you won’t have to go through the configuration wizard again. On the profile tab, just click the ‘Plus’ to create a new profile, which will duplicate your current settings.
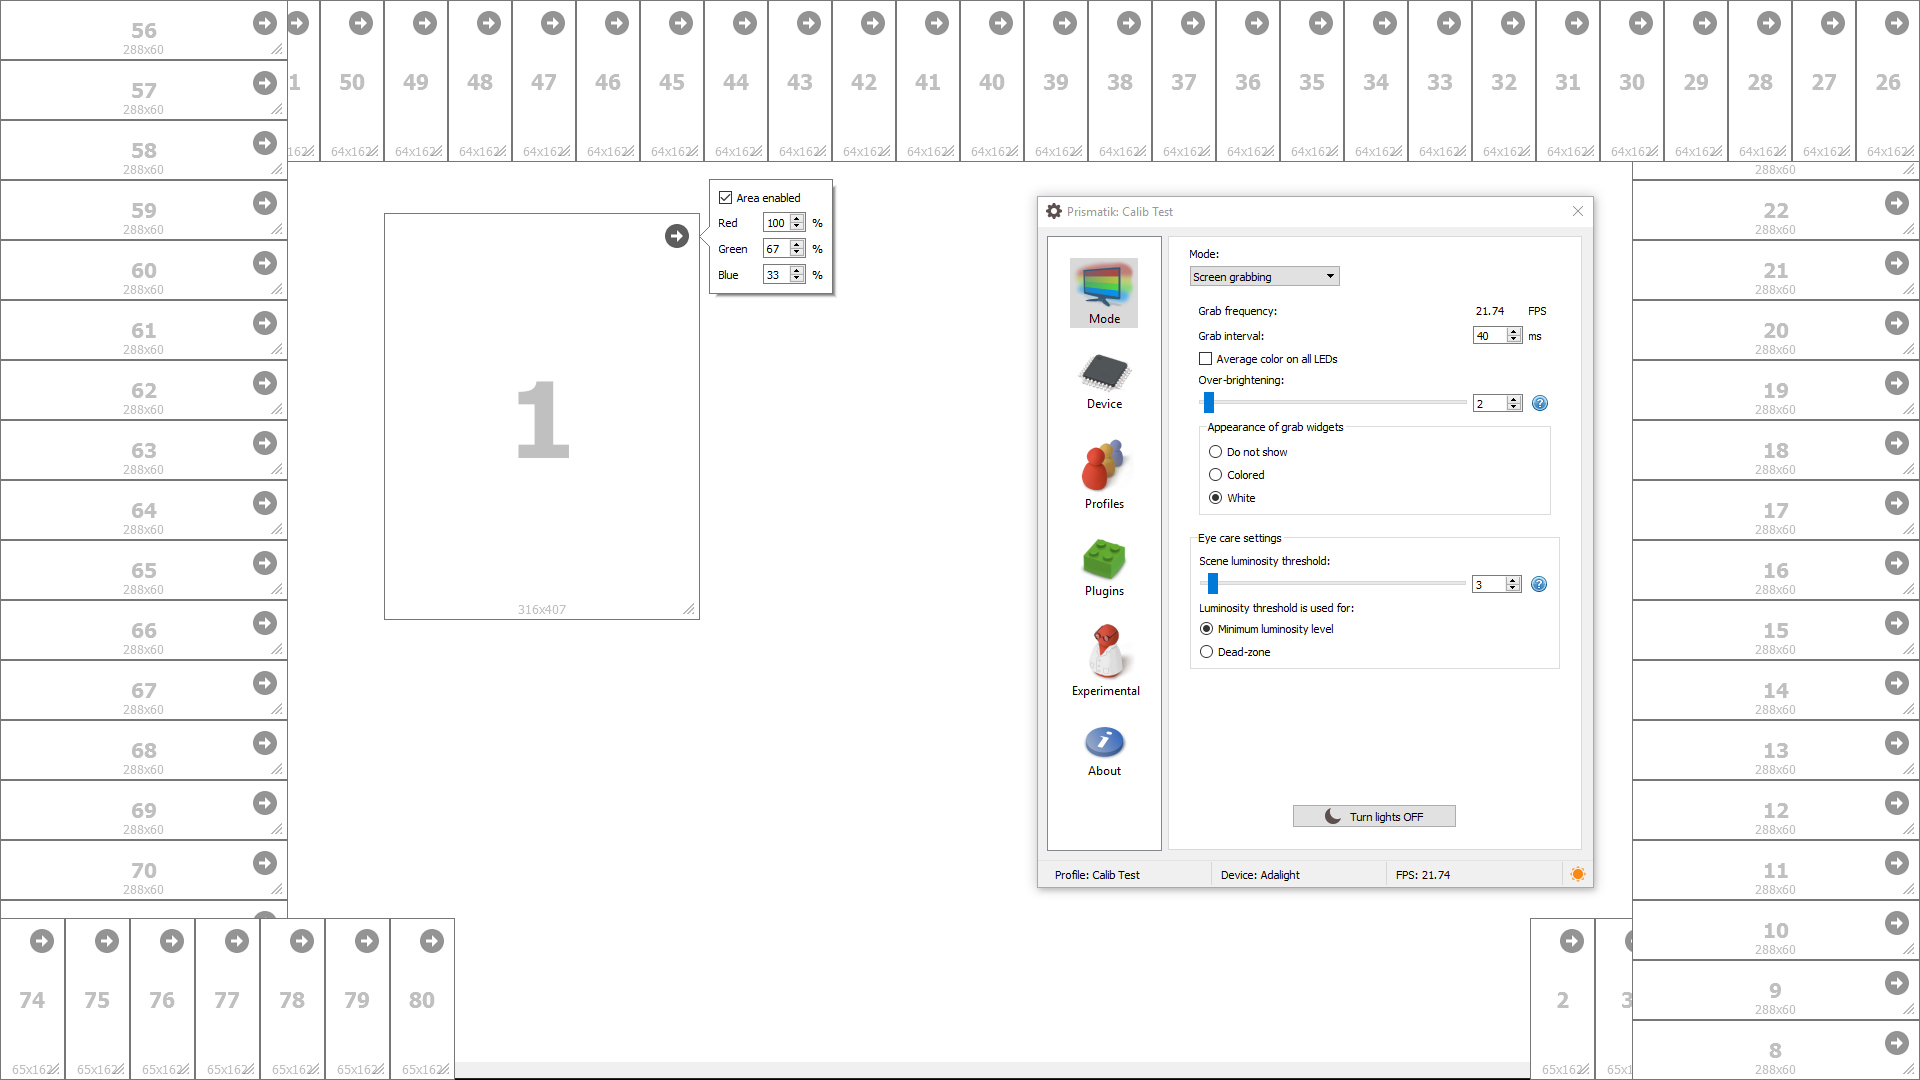
Do you still have that Notepad window open? Maximize it so there’s a clean white reference all around the screen. Then in Prismatik under the ‘Mode’ tab find where it says “Appearance of grab widgets”, set them to ‘White’. You’ll see that the zone widgets from the config wizard are back, and overlaid on top of your desktop.
Click and drag the #1 widget to the center of the screen, and make sure the area it’s covering is completely white. See the unassuming arrow in the upper-right corner? If you click on it, a popout box appears with adjustments for the zone’s red, green, and blue values. Voilà! These are your calibration values. If this is your first time calibrating, they will all be set at 100%.
As an aside: note that because adjusting two colors will affect the balance of the third, it’s important to keep at least one of the channels at 100% in order to get the brightest results. Typically this is the red channel, as most traditional lights are shifted blue/yellow with a slight green/magenta tint. For my strip with a LOT of blue and a bit of green, I’m going to leave the red channel alone.
Setup is a bit of a bear, but the actual adjustment is easy! As you change the RGB percentages for the #1 grab widget, the LEDs should update to reflect the new values. Find a set that you like, and write them down! Don’t be afraid to try a few, the RGB leds can play tricks with your eyes.
Final Step: Adding the Calibration to the other LEDs
Once you’ve found your calibration numbers, the last step is to add them to the other LEDs! Before going any further, be sure to re-upload the Adalight sketch to the Arduino with the #CALIBRATE tag set OFF (commented).
After playing with the color adjustments, these settings looked good to my eye:
 Red:   1.0
 Green: 0.67
 Blue:  0.33
Set the grab widgets to ‘do not show’ once again, and then switch to the ‘Profiles’ tab. Select the profile you want to add your calibration to and click on the ‘Open in text editor’ button. Scroll down and you’ll see that under each [LED] entry is a set of three variables, CoefRed, CoefGreen, and CoefBlue. Find and replace each entry with the new calibration numbers. For my profile they look like this:
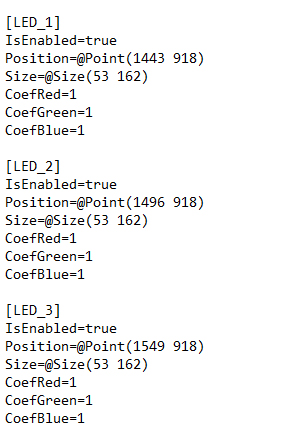
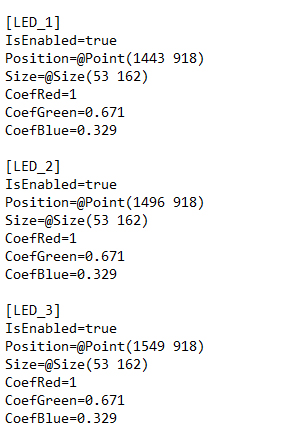
After you’ve added the calibrated coefficients, save the profile and go back into Prismatik. Switch the lights to a different profile, and then back to the one you just edited. Prismatik will read the new coefficients and your lights will be calibrated!
Additional Calibration Settings
While setting the correct white point is the most important calibration tweak, Prismatik has a few other settings you can use to change how the LEDs are rendered. These can all be changed on the fly in the Prismatik application – no profile editing required.
Over-Brightening (0-100%)
Changing this setting will affect the brightness of LEDs when a dark color is sampled. At 0% (default), dark colors onscreen will result in a dark (i.e. dim) color sent to the LED strip. At 100%, dark colors onscreen will be rendered at full brightness (e.g. a dark red will be sent to the strip as 100% brightness red).
Luminosity Threshold (0-100%)
This sets the base white level when the sampled colors are dark. At 0% the lights will be completely off if the sampled color is pure black. At 3% (default) the lights will always have a base color of 3% brightness white which adds some gentle backlighting at all times. At 100% the lights will always be white, even if the entire screen is black.
Gamma Correction (0.00-10.0)
Controls the gamma (contrast) curve, which affects color saturation. Smaller values result in a brighter, less saturated color. Larger values result in a darker, more saturated color. Default value is 2.0.
Conclusion
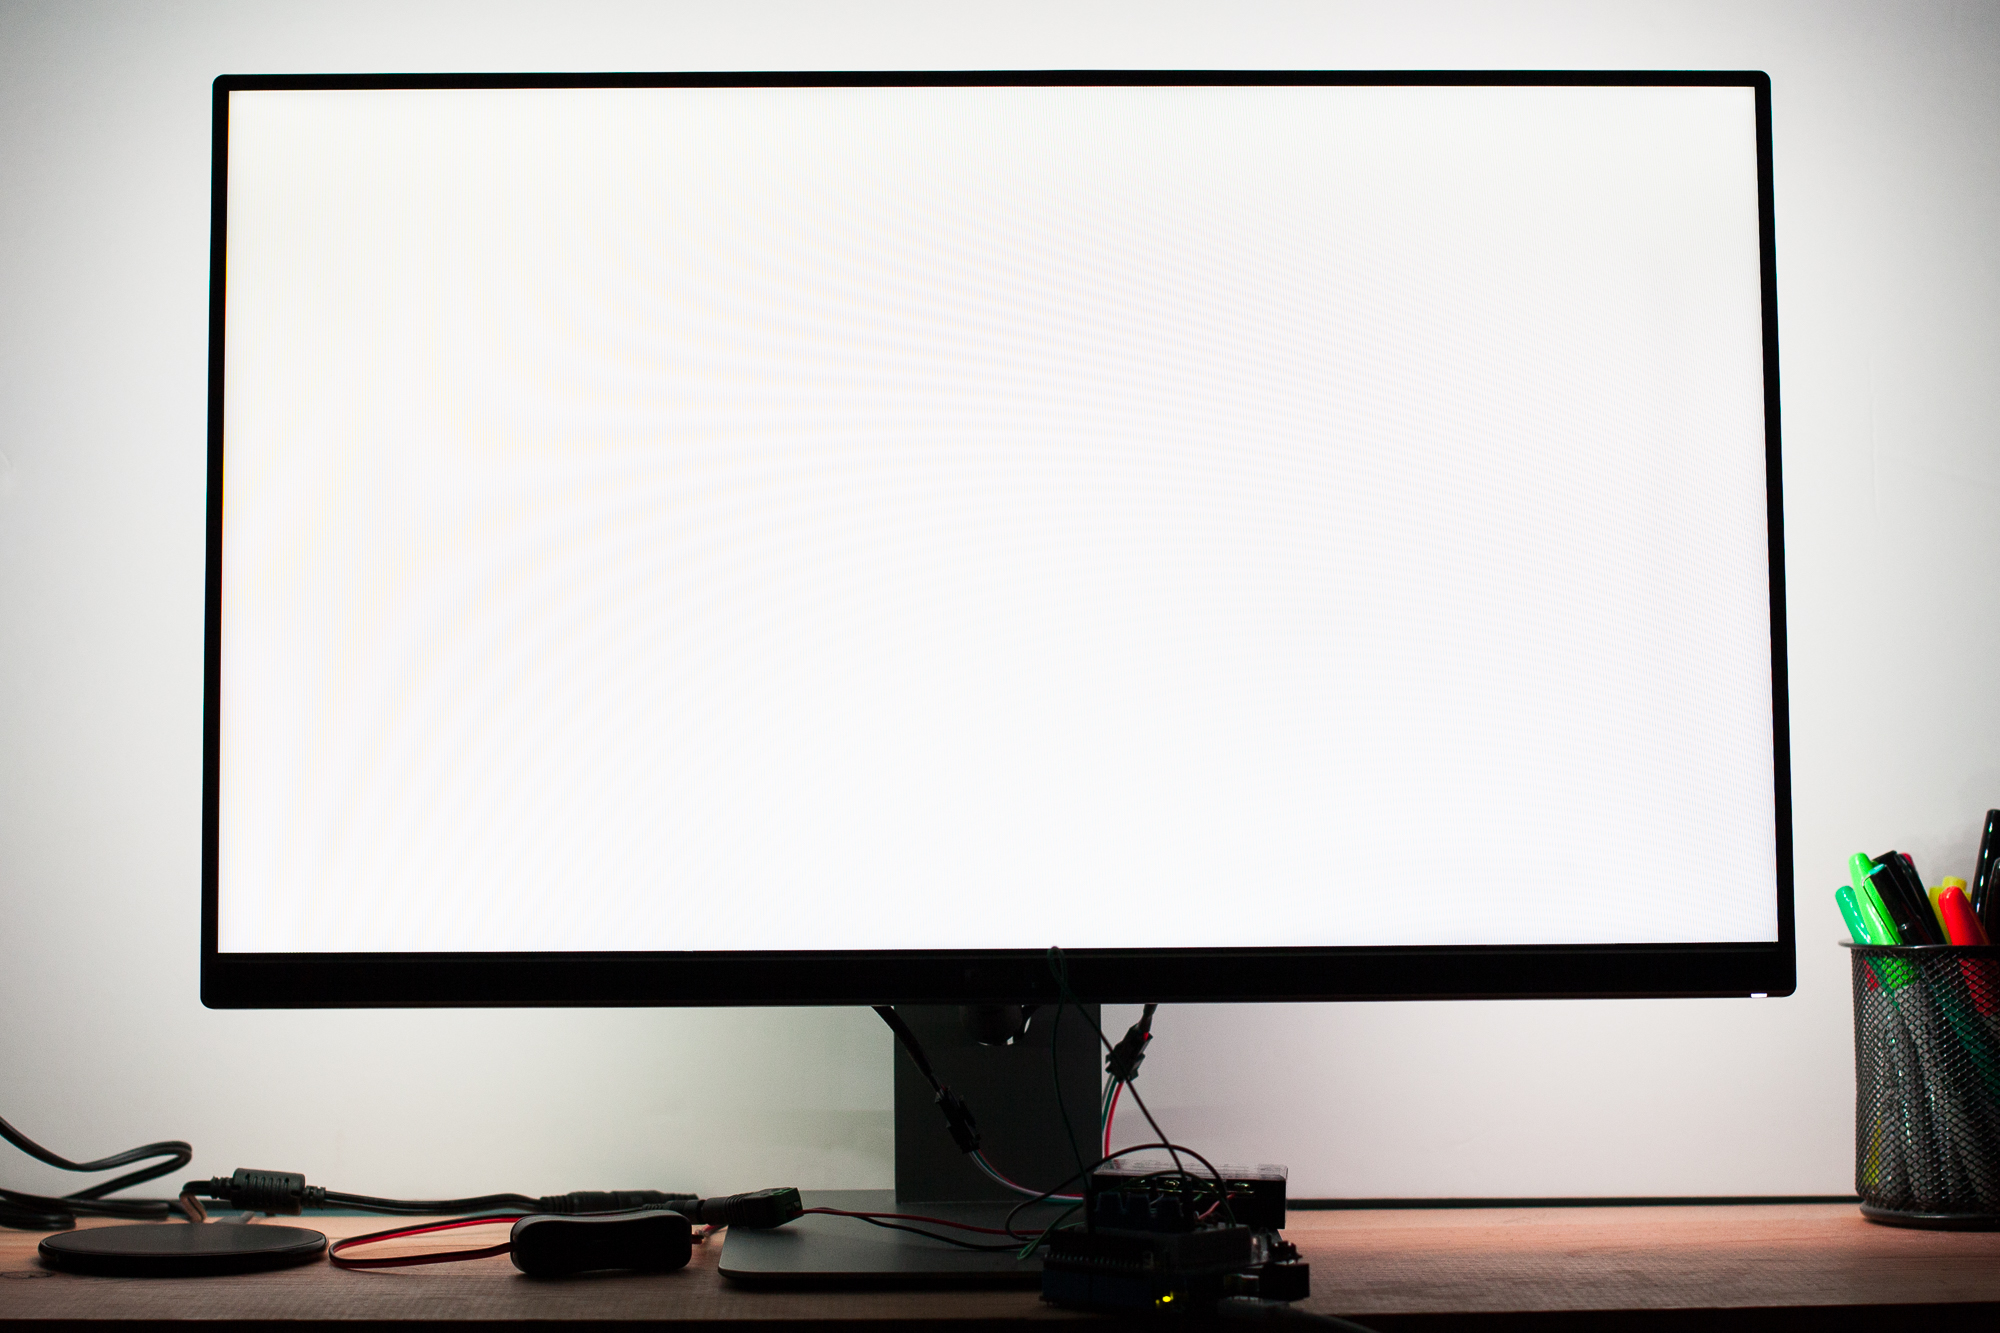
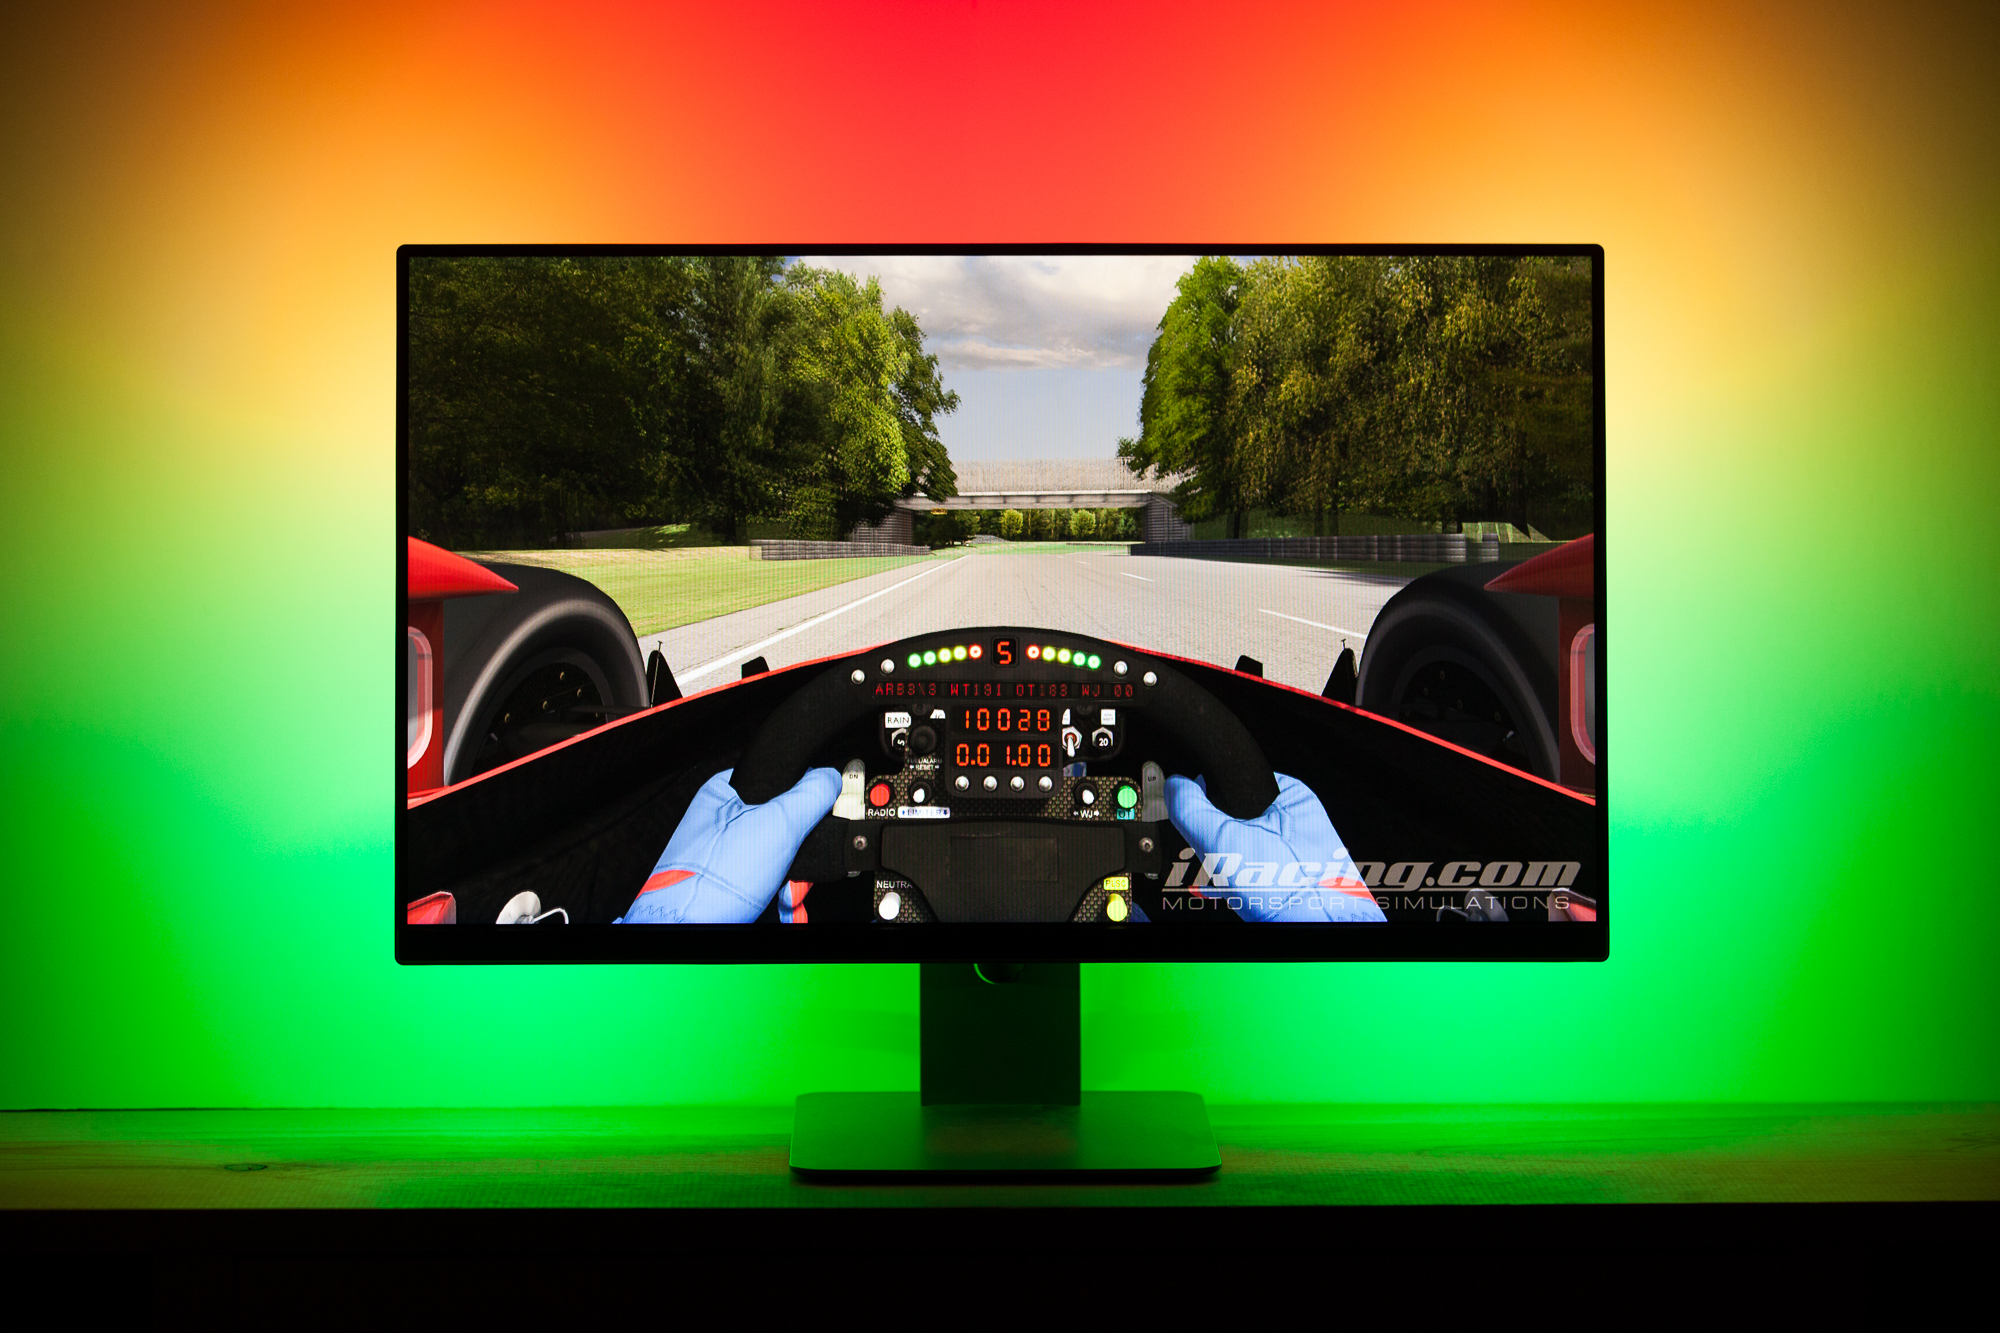
You made it to the end! The lights are fully calibrated and looking great. Hopefully you’ve learned a bit about Prismatik and color calibration, and if you’re calibrating your own lights I hope this has helped you. If you’re just following along with my progress, get excited because we’re nearing the end!
Next up: Part 5 – Making a Custom PCB and Case for Adalight
Confession Time
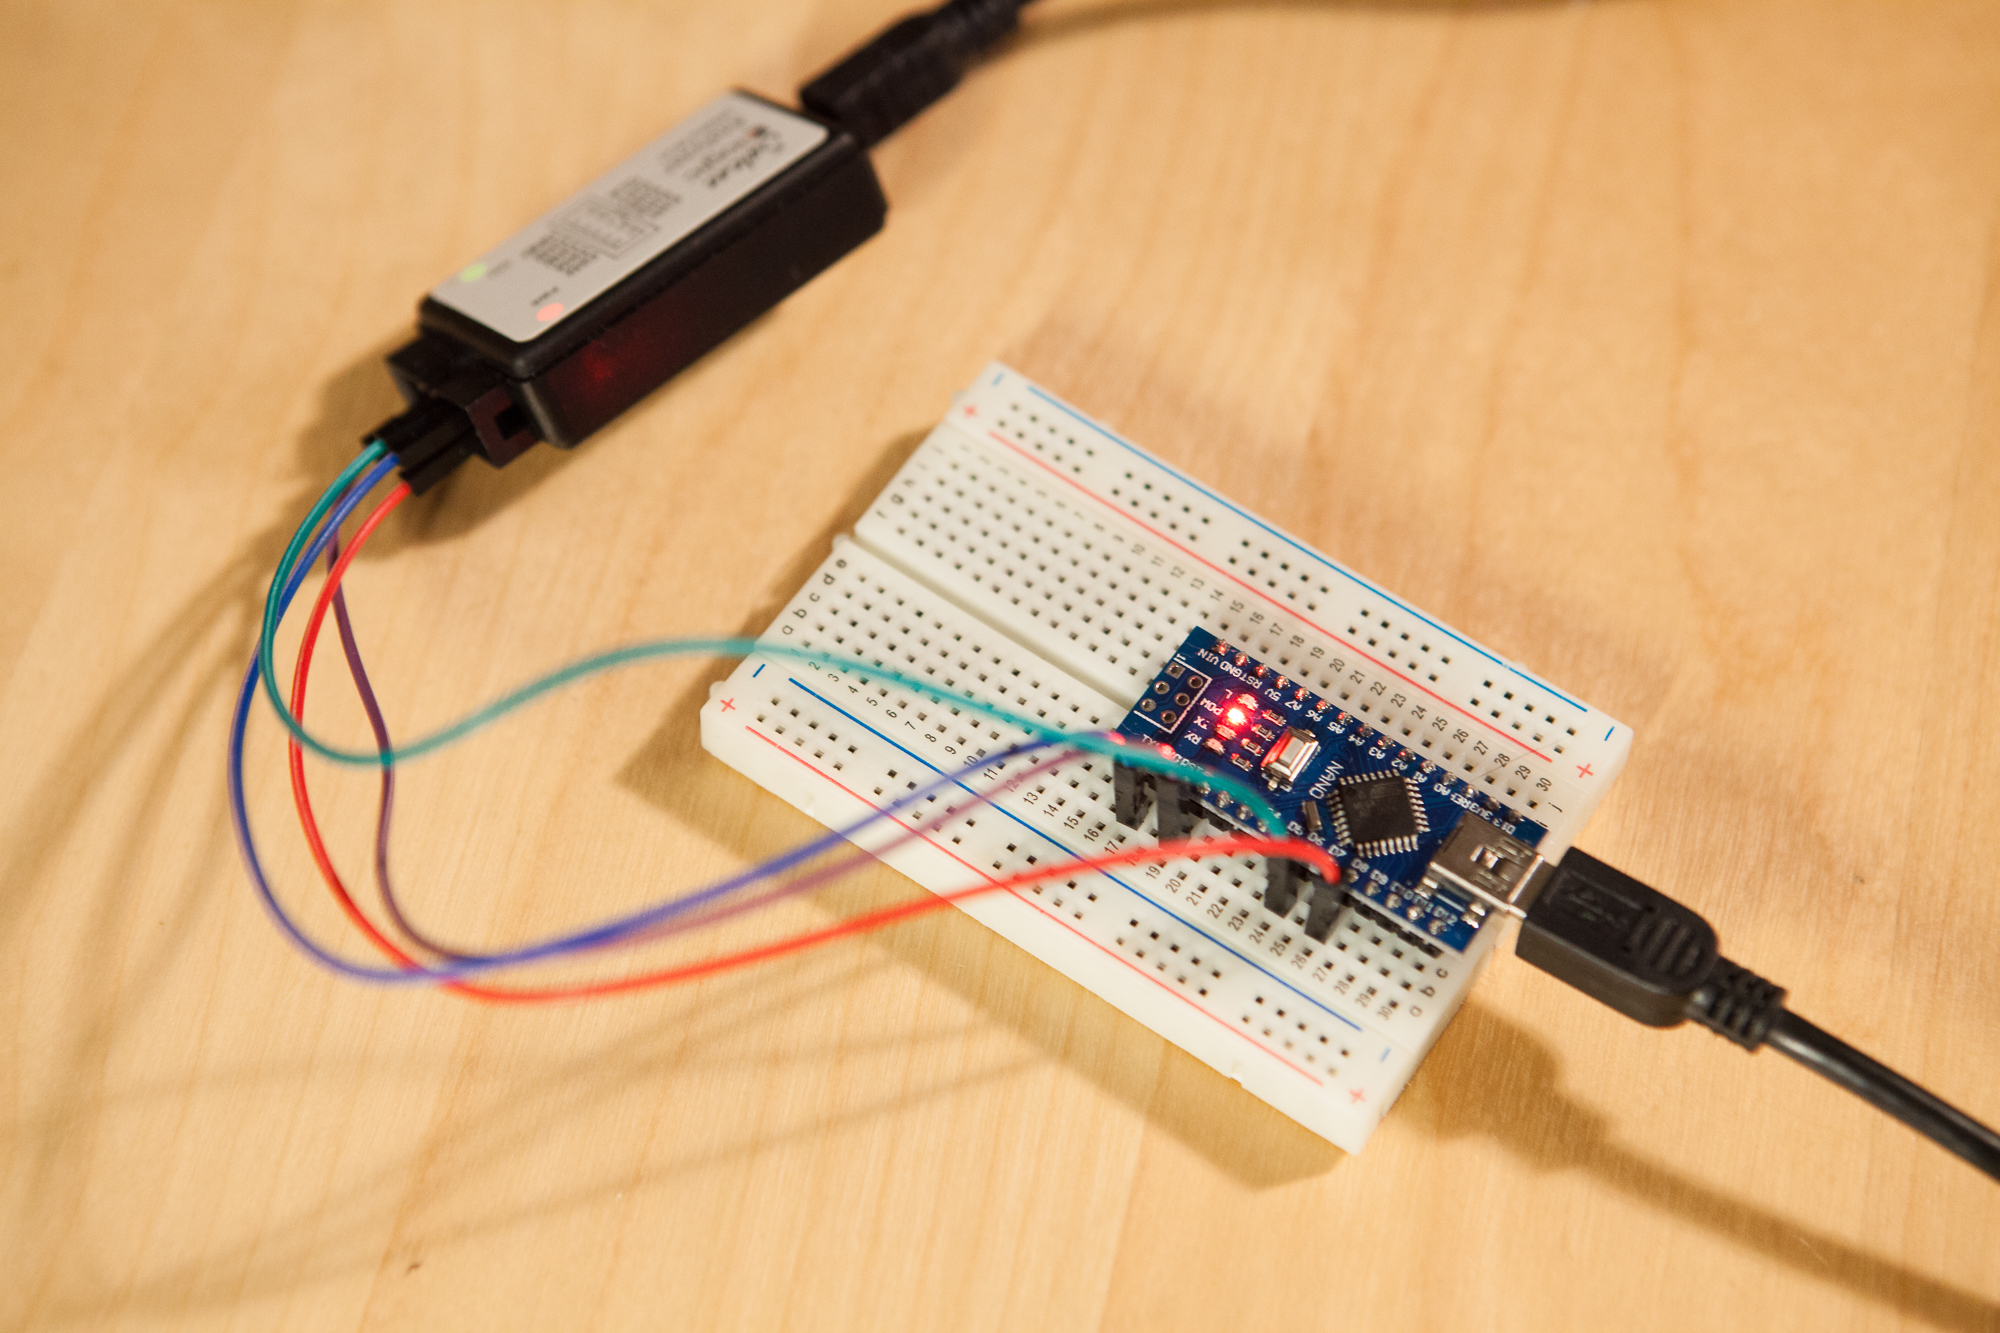
Initially I didn’t even realize that Prismatik had color correction built into its GUI! The arrow on the grab widget is really unintuitive, so I did my initial calibration using the NeoPixel mixing board, with the code modified to work with FastLED and WS2812B LEDs. This worked pretty well, and if you have some extra hardware lying around or if you’re using a non-Adalight device it’s a useful alternate calibration method. Code below.
#include <FastLED.h>

#define rPin 0
#define gPin 1
#define bPin 2

#define numLEDs 80
#define ledPin 6

CRGB leds[numLEDs];

void setup(){
  Serial.begin(9600);

  FastLED.addLeds<WS2812B, ledPin, GRB>(leds, numLEDs);
  FastLED.show();
}

void loop() {
  char msg[64];
  uint8_t r, b, g;

  //Converts analog 4 byte value to 1 byte.
  r = analogRead(rPin) / 4;
  g = analogRead(gPin) / 4;
  b = analogRead(bPin) / 4;

  sprintf(msg, "R: %3u G: %3u B: %3u", r, g, b);
  Serial.println(msg);

  for(int i=0; i<numLEDs; i++){
    leds[i].r = r;
    leds[i].g = g;
    leds[i].b = b;
  }

  FastLED.show();
}
